In this tutorial I will show you how to create Java Gradle project in IntelliJ IDEA. If you have not installed already IntelliJ IDEA then you can download and install it from the below link
https://www.jetbrains.com/idea/download/
You need to download and install also Gradle, you can use the below link for it
https://gradle.org/install
Now you need to add Gradle to the System Path variable.
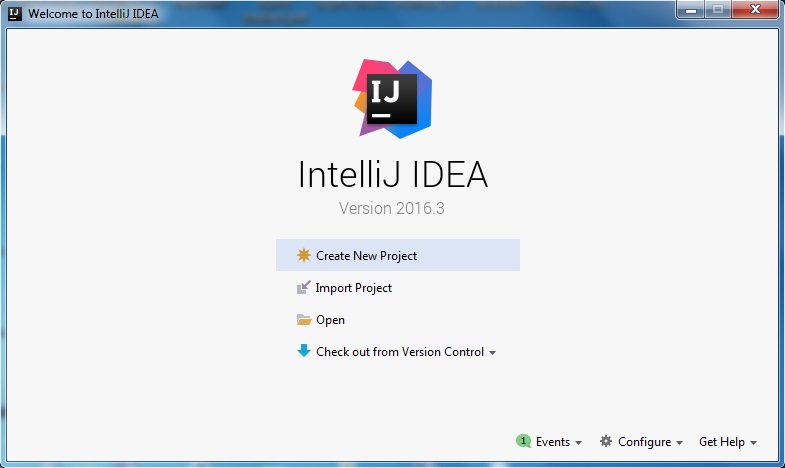
For creating new project in IntelliJ IDEA, open IntelliJ IDEA and you will see the below screen. If no project is currently opened in IntelliJ IDEA, click Create New Project on the Welcome screen: Otherwise, select File -> New -> Project from the main menu.
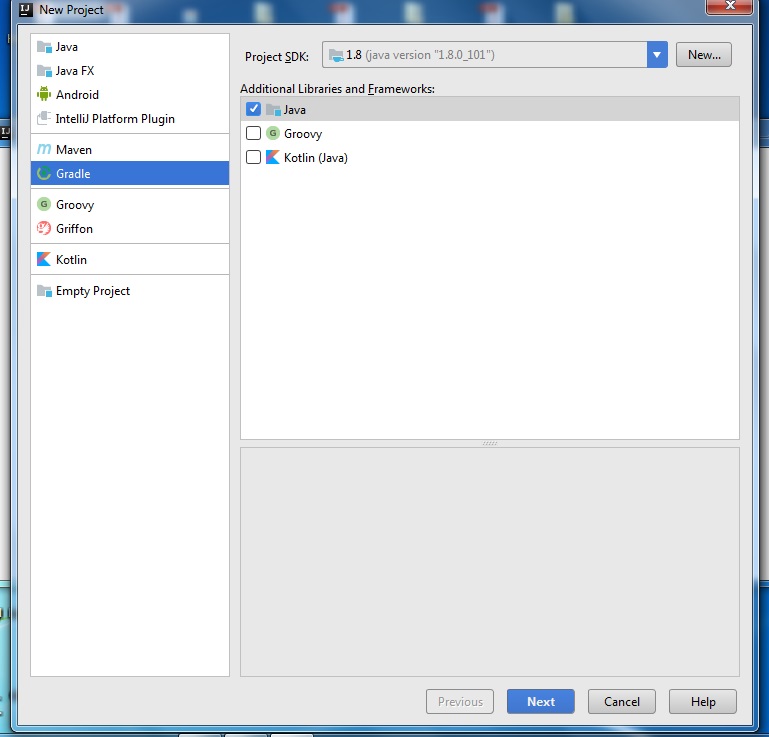
In the left-hand pane, select Gradle. In the right-hand pane, select Project SDK – JDK (1.8). For Additional Libraries and Frameworks – this area is used to select an additional framework or a library for your Gradle project. IntelliJ IDEA adds the appropriate plugin to the build.gradle file. Click Next. Please refer to the following screen
On the next page of the wizard, you can select the following options:
GroupId – specify groupId of the new project, which will be added to the build.gradle file.
ArtifactId – specify artifactId that is added as a name of the new project and will be added to the build.gradle file.
Version – specify version of the new project, which will be added to the build.gradle file. By default, this field is populated automatically.
Please refer to the following screen

Click Next.
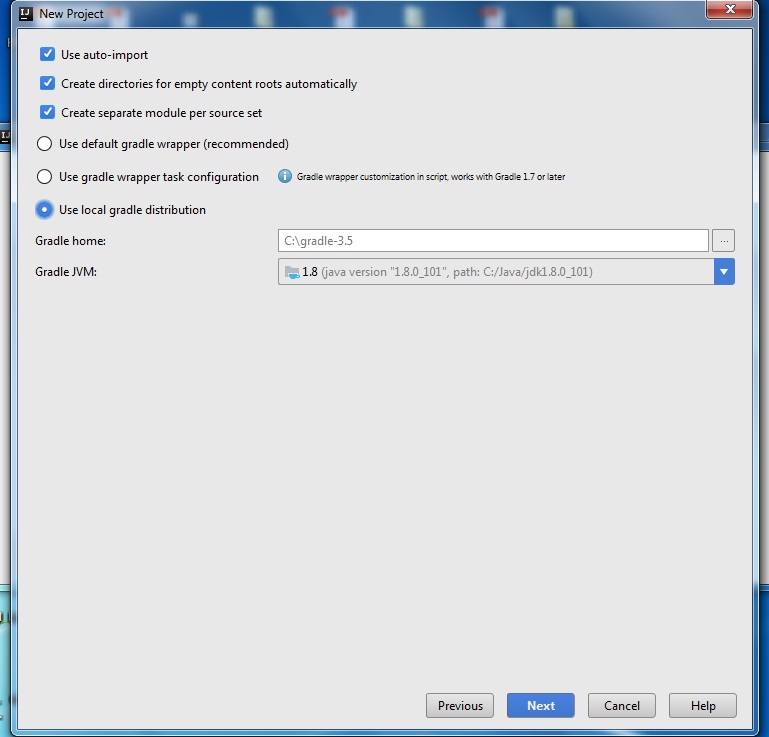
On the next page, specify the following settings:
Use auto-import – select this check box to resolve all changes made to the Gradle project automatically every time your your project gets refreshed.
Create directories for empty content roots automatically – this option is used to create a default directory structure for a Gradle project, e.g. /src/main/java and /src/test/java.
Create separate module per source set – this option is used for the source sets feature in resolving Gradle projects.
Use local gradle distribution – this option is for using local Gradle installation.
Gradle home – specify the fully qualified path to Gradle installation. This field becomes active when you select Use local gradle distribution. If Gradle location has been defined by the environment variables GRADLE_HOME or PATH, then IntelliJ IDEA deduces this location, and suggests this path as the default value.
Gradle JVM – specify JVM under which Gradle project will run.
Please refer to the following screen
Click Next.
In next window, specify the name and location settings as shown in below screen.

Click Finish.
Now when IntelliJ IDEA finishes build process then you can open the build.gradle file that looks similar to the below.
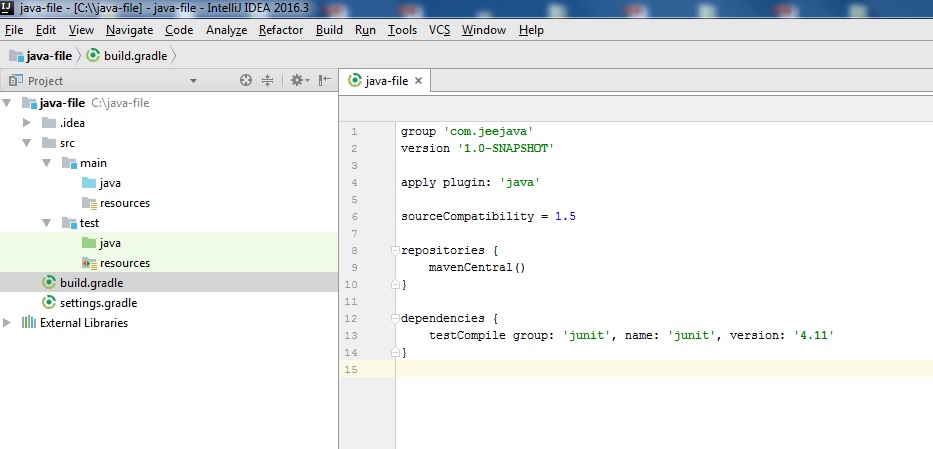
In the above build file, you see project group (similar to groupId in maven), project version. apply plugin: ‘java’ – it adds Java compilation along with testing and bundling capabilities to a project.
sourceCompatibility – specifies that version of the Java programming language be used to compile .java files.
targetCompatibility – this option ensures that the generated class files will be compatible with VMs specified by targetCompatibility.
repositories { mavenCentral()}
The above option tells Gradle to look in the Maven central repository for any dependencies that are required.dependencies { testCompile group: 'junit', name: 'junit', version: '4.11'}
The above dependency tells that junit is required to compile the project’s test classes.
You can update the above build.gradle file as shown below
group 'com.roytuts'
version '1.0-SNAPSHOT'
apply plugin: 'java'
sourceCompatibility = 1.8
targetCompatibility = 1.8
repositories {
    mavenCentral()
}
dependencies {
    testCompile group: 'junit', name: 'junit', version: '4.12'{
        exclude group: 'org.hamcrest'
    }
    testCompile 'org.hamcrest:hamcrest-library:1.3'
}
In the above file, targetCompatibilty is added and default hamcrest library that comes with junit has been excluded and added later for version 1.3.
Thanks for reading.