Introduction
This guide will walk you through the installation process of LAMP stack on CentsOS 7 in VPS server. LAMP is an acronym that represents Linux operating system, Apache web server, MySQL database server and PHP scripting language, which is used to build a dynamic web application whose data are stored into MySQL server and run this web application on Apache web server in Linux environment.
As we are going to install softwares on CentOS 7 environment in VPS server, so our first requirement is already fulfilled by the hosting server environment, i.e., Linux operating system – CentOS 7. We will see in rest of the sections in this tutorial how to install Apache, MySQL (MariaDB) and PHP.
We will install softwares in CentOS 7 using yum package manager. yum package manager allows us to install most of the softwares from a repository which is maintained by CentOS.
Prerequisites
Before you begin you should have a separate non-root user account setup in your VPS server. You should not perform any regular tasks or activities on root account as it may cause accidental unavoidable damage to the system.
To setup a regular user account with root privileges please go through the tutorial Initial VPS Server Setup on CentOS 7.
Install Apache Web Server
At present the Apache web server is most popular and a great choice for deploying your dynamic web applications.
We can install Apache easily using CentOS’s package manager yum using the following command:
$ sudo yum install httpdAs we said earlier that whenever you want to execute command with root privileges you need to use sudo. You may need to enter password when terminal asks for verification.
Once installed you can start your Apache server on your VPS using the following command.
$ sudo systemctl start httpd.serviceNow your server has been started as well. So you can verify your server installation by accessing your VPS server’s public IP address in the browser in the following way:
http://your_server_ip_addressMake sure to replace the your_server_ip_address by your VPS server’s public IP address.
Even you can find your VPS server’s public IP address using the following command:
$ ip addr show eth0 | grep inet | awk '{ print $2; }' | sed 's/\/.*$//'The above command will print your server’s IP address on the Unix terminal.
When you hit your URL (IP address) in the browser, you will get similar to the following image:
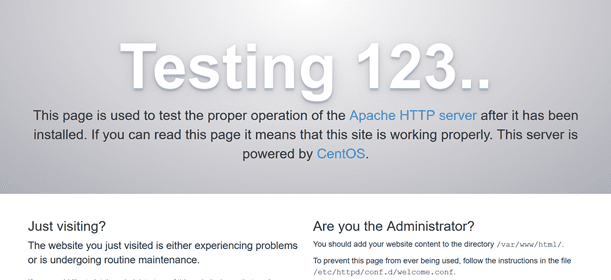
If you see the above page on browser, then your web server was correctly installed.
Finally you want to enable Apache to start on boot using the following command:
$ sudo systemctl enable httpd.serviceYour httpd service is enabled successfully.
Install MySQL (MariaDB)
At this point your Apache web server is running and up and ready to serve web pages from the web root. It is time to install MariaDB server, which is a community developed fork of the MySQL server. This relational database management system (RDBMS) will store information and provides access for our web application.
Again we will use yum package manager to install MariaDB (MySQL) server.
Use below command on your Unix terminal to install the MySQL server:
$ sudo yum install mariadb-server mariadbOn installation complete the server has not been started automatically. So we will execute below command to start the MySQL server:
$ sudo systemctl start mariadbNow MySQL server is up, we want to run a simple security script that will remove some dangerous defaults and secure access to our database system one level up. Execute below command to do so:
$ sudo mysql_secure_installationThe prompt will ask for current root password and since it is a first time you are installing MySQL, you won’t have the password, so leave it blank by pressing enter. Then the prompt will ask you if you want to set a root password. Enter Y, and follow the instructions:
Enter current password for root (enter for none):
OK, successfully used password, moving on...

Setting the root password ensures that nobody can log into the MariaDB
root user without the proper authorization.

New password: root
Re-enter new password: root
Password updated successfully!
Reloading privilege tables..
 ... Success!
For the rest of the questions, you simply hit the ENTER key for each prompt to accept the default value. This will remove some sample users and databases, disable remote root login.
Finally we need to enable the MySQL service on boot using the following command:
$ sudo systemctl enable mariadb.serviceAt this moment the MySQL server is running. Next we will install PHP.
Install PHP
PHP is one of the most popular and a great language to build dynamic web applications with little learning curve. It runs scripts, connects to MYSQL (MariaDB) server to fetch the required information for your website and hand the processed content over Apache web server to display on web pages.
We will install not only PHP package but also PHP MySQL package as we need to establish connection with MySQL from PHP scripts.
$ sudo yum install php php-mysqlThe above command will install the required modules in our VPS server on CentOS 7.
We need to restart the Apache web server in order to work with PHP. You can do this by typing the following command:
$ sudo systemctl restart httpd.serviceAt the end of this step your Apache web server has been restarted.
Testing the PHP processing on Apache Web Server
Now we will test our system is configured properly for PHP. So we will create a simple PHP script called info.php under the web root directory /var/www/html/ (location of web root in CentOS 7).
We will create the file in this location by typing the command:
$ sudo vi /var/www/html/info.phpvi is the default editor ships with Linux based system CentOS.
Above command will create and open file info.php. Now press i from your keyboard to enter INSERT mode for writing into it.
Write the below line into this file.
<?php phpinfo(); ?>To save and exit from the file, type :wq command.
If you are running a firewall, run the following commands to allow HTTP and HTTPS traffic:
sudo firewall-cmd --permanent --zone=public --add-service=http
sudo firewall-cmd --permanent --zone=public --add-service=https
sudo firewall-cmd --reload
If you find any DNS connection related error then you may want to also allow the default port 53 of DNS to avoid any connectivity issue related to DNS.
sudo firewall-cmd --permanent --zone=public --add-service=53/tcp
sudo firewall-cmd --permanent --zone=public --add-service=53/udp
sudo firewall-cmd --reload
Now we can test whether our web server correctly displays content generated by a PHP script.
Type the following URL in your web browser:
http://your_server_ip_address/info.phpThe page that should look something similar to the below image:
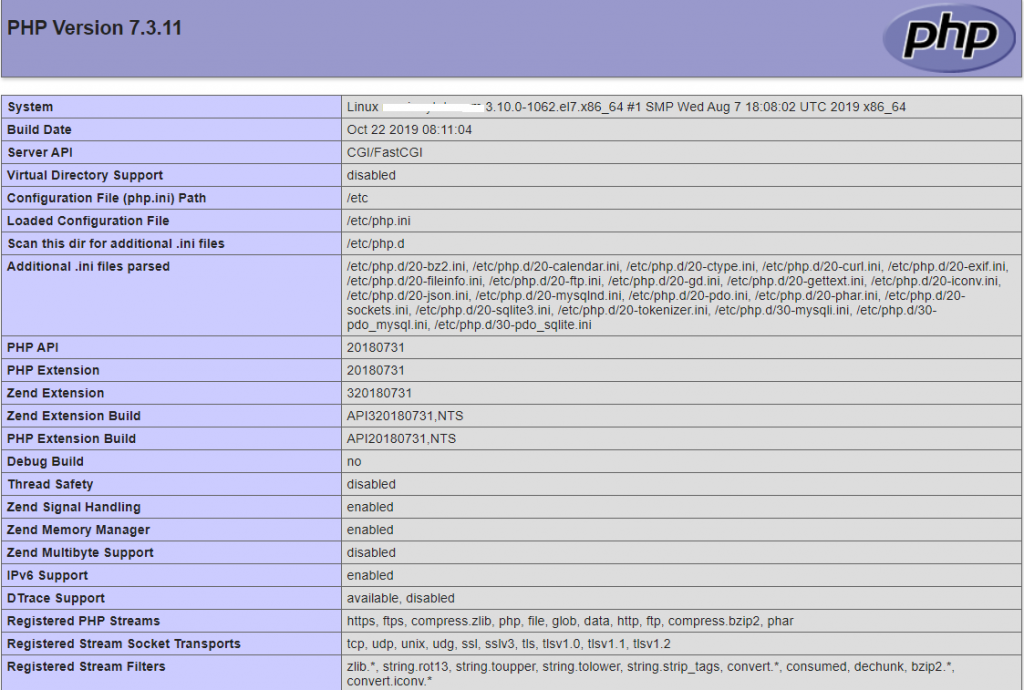
This page actually gives you information about your server from the perspective of PHP. It is useful for debugging and to ensure that your settings are applied correctly.
Therefore your PHP is working as expected.
You should remove this info.php file once the testing is done, because it gives information about your server to unauthorized users.
To delete the file, use the below command:
$ sudo rm /var/www/html/info.phpYou can always recreate this page if you need to access the information again.
Congratulations! You have successfully installed LAMP stack on CentOS 7 in your new VPS server.
Thanks for reading.