Introduction
In this tutorial I am going to show you how to build CRUD operations on REST APIs using Python based Django framework and MySQL as a persistent repository.
CRUD is an acronym that basically means Create Read Update Delete. So we are going to create new resource, update existing resource, delete existing resource and retrieve or fetch existing resource.
REST is an acronym that actually means Representational State Transfer and it works on stateless http/https protocol. REST endpoints are called resources.
Prerequisites
Django 3.0.8, Python 3.8.5, MySQL 8.0.17, Django REST framework (pip install djangorestframework)
It is assumed that you have already installed and configured Python on your system.
Next task is to install Django. The preferred method would be to install using the command pip install Django. You can read more details on Django installation.
We are going to use MySQL database server as a persistent system for storing data, so you need to read tutorial how to setup MySQL with django for executing SQL statements.
Project Setup
The first thing we need to create project directory. The project name is djangomysqlrestcrud which we will create using the following command.
django-admin startproject djangomysqlrestcrudNext step is to create an app inside the project to perform CRUD operations. Create an app called restcrud using the following command.
django-admin startapp restcrudThe required project and app structures will be created.
Now we need to add this restcrud app into the project. So edit the file djangomysqlrestcrud/djangomysqlrestcrud/settings.py and add the following line into INSTALLED_APPS section:
INSTALLED_APPS = [
    'restcrud.apps.RestcrudConfig',
    'django.contrib.admin',
    ...
]
The above line is formed using the file djangomysqlrestcrud/restcrud/apps.py. You will see the RestcrudConfig class in this file with the name = ‘restcrud’.
Database Configurations
Next step is to setup or configure database with django framework. Edit the file djangomysqlrestcrud/djangomysqlrestcrud/settings.py and change the database settings as follows:
DATABASES = {
    'default': {
        'ENGINE': 'django.db.backends.mysql',
        'NAME': 'roytuts',
	'USER': 'root',
	'PASSWORD': 'root',
	'HOST': 'localhost',
	'PORT': '3306'
    }
}
Model Class
We have configured database settings to establish connection with MySQL server. The next step is to create a model class that represents the django mapping with table.
Let’s say we have the below user table with some sample data under roytuts database.
CREATE TABLE `user` (
  `id` int unsigned NOT NULL AUTO_INCREMENT,
  `name` varchar(50) NOT NULL,
  `email` varchar(100) NOT NULL,
  `phone` int unsigned NOT NULL,
  `address` varchar(250) NOT NULL,
  PRIMARY KEY (`id`)
) ENGINE=InnoDB AUTO_INCREMENT=6 DEFAULT CHARSET=utf8mb4 COLLATE=utf8mb4_unicode_ci;

insert  into `user`(`id`,`name`,`email`,`phone`,`address`) values
(1,'Soumitra Roy','sroy@gmail.com',2147483647,'Earth'),
(2,'Rahul Kumar','rahul@gmail.com',34256780,'Mars');
The equivalent model class would be as follows:
from django.db import models

class User(models.Model):
	id = models.AutoField(primary_key=True)
	name = models.CharField(max_length=50)
	email = models.CharField(max_length=100)
	phone = models.IntegerField()
	address = models.CharField(max_length=250)

	class Meta:
		db_table = "user"

	def __str__(self):
		return self
The above class is written into djangomysqlrestcrud/restcrud/models.py file.
Each model is represented by a class that subclasses django.db.models.Model. Each model has a number of class variables, each of which represents a database field in the model.
Each field is represented by an instance of a Field class – e.g., CharField for character field, IntegerField for integer and DateTimeField for datetime. This tells Django what type of data each field holds.
I have used AutoField for out primary key instead of IntergerField otherwise when you will make a POST request to create new user record and if you are returning the newly created record from server then you will get null value for id field. Making it AutoField will give you the exact value for id filed for the new user record inserted into table.
The name of each Field instance (e.g. id or name) is the field’s name, in machine-friendly format. You will use this value in your Python code, and your database will use it as the column name.
You can use an optional first positional argument to a Field to designate a human-readable name.
I have specified the table name under class Meta.
It is important to add __str__(self) method to model class, because object representations are used throughout Django application.
Sync Model Class and Database Table
First we check if there is any issue in the application by executing the following command. This command can be run at any point of time to check system’s issue.
manage.py checkRunning the above command will give you the following output:
System check identified no issues (0 silenced).If your application has any error(s) then it will show you those error(s).
Now execute the following command to sync our database table. If table does not exist then table will be created in the database.
manage.py makemigrationsThe above command will give you output as follows:
Migrations for 'restcrud':
  restcrud\migrations\0001_initial.py
    - Create model User
You can also see the contents of the generated file restcrud\migrations\0001_initial.py at any time.
You can also use migrate command, which will run the migrations for you and manage your database schema automatically. So if your table already does not exist in the database then this command will create for your application.
You can still run this command to check if model class is synced with your database table. So for my application as I have already created table in database so eventually it will give the following error:
django.db.utils.OperationalError: (1050, "Table 'user' already exists")Serializers
I will create some serializers that are used to represent data. Serializers allow complex data such as querysets and model instances to be converted to native Python datatypes that can then be easily rendered into JSON, XML or other content types. Serializers also provide deserialization, allowing parsed data to be converted back into complex types, after first validating the incoming data.
The ModelSerializer class provides a shortcut that lets you automatically create a Serializer class with fields that correspond to the Model fields.
I am going to create a file called serializers.py under folder djangomysqlrestcrud/restcrud and writing the following code into it.
Here I am making the id field optional because when you want to insert new user you might not want to put value for id field in your request object.
from rest_framework import serializers
from restcrud.models import User

class UserSerializer(serializers.ModelSerializer):
    class Meta:
        model = User
        fields = ['id', 'name', 'email', 'phone', 'address']
        extra_kwargs = {'id': {'required': False}}
Views
Now I will write code for views into djangomysqlrestcrud/restcrud/views.py. Here I am going to use ViewSets which will allow me to write multiple views together. If you want you can also create individual view.
I am fetching user records from database based on user id in ascending order. Note that for fetching single user record you don’t need to define separate endpoint.
from django.shortcuts import render
from rest_framework import viewsets
from django.http import Http404
from rest_framework import status
from rest_framework.response import Response
from restcrud.serializers import UserSerializer
from restcrud.models import User

class UserViewSet(viewsets.ModelViewSet):
    """
    API endpoint that allows users to be viewed/created/edited/deleted.
    """
    queryset = User.objects.all().order_by('id')
    serializer_class = UserSerializer
    update_data_pk_field = 'id'

    def create(self, request, *args, **kwargs):
        kwarg_field: str = self.lookup_url_kwarg or self.lookup_field
        self.kwargs[kwarg_field] = request.data[self.update_data_pk_field]

        try:
            return self.update(request, *args, **kwargs)
        except Http404:
            return super().create(request, *args, **kwargs)

    def destroy(self, request, *args, **kwargs):
        try:
            instance = self.get_object()
            instance.delete()
        except Http404:
            pass
        return Response(status=status.HTTP_204_NO_CONTENT)
Notice how I defined create() function to either create or update record. I have also defined destroy() function to delete the existing record.
URLs
Next step is to write API endpoint URL in the file djangomysqlrestcrud/djangomysqlrestcrud/urls.py.
As I am using viewsets instead of views, I can automatically generate the URL conf for REST API, by simply registering the viewsets with a router class.
Again, if you are using individual view then you can configure API URL explicitly.
from django.urls import include, path
from rest_framework import routers
from restcrud import views

router = routers.DefaultRouter()
router.register(r'users', views.UserViewSet)

urlpatterns = [
    path('', include(router.urls)),
]
Deploying Application
Now I am ready to test the API I have built. Let’s fire up the server from the command line using manage.py runserver. The application will run on default port 8000. If you want to change the default host/port of the server then you can read tutorial here.
Testing APIs
I am going to use Postman tool to test REST APIs here.
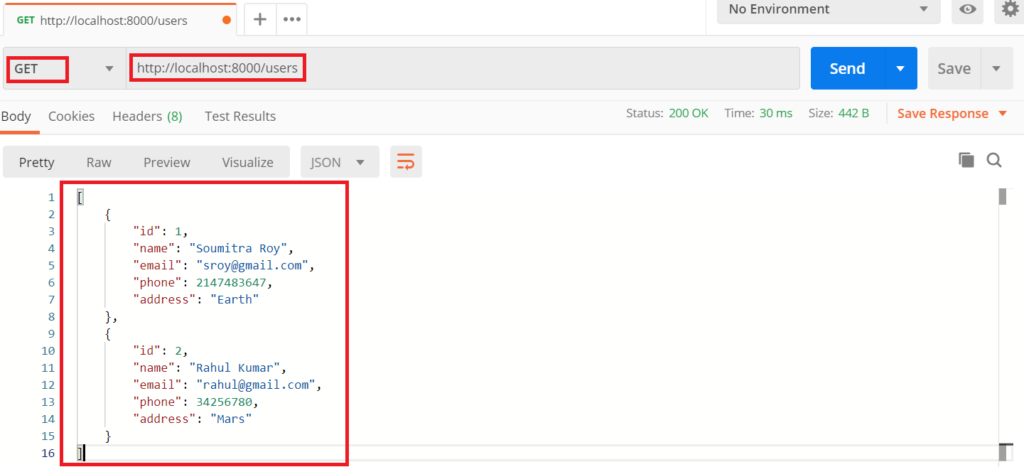
Retrieve All User Records
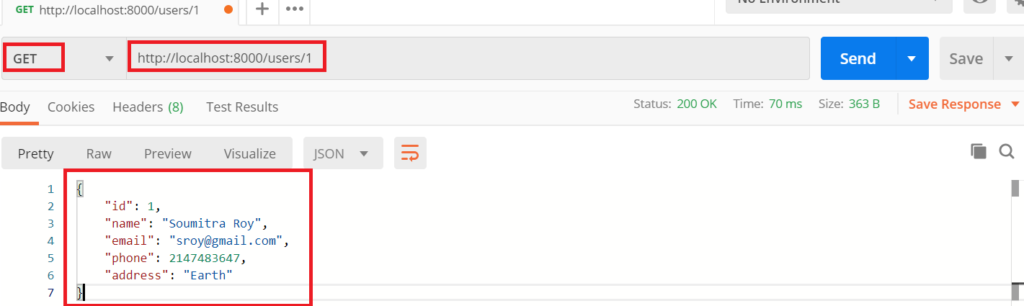
Retrieve Single User Record
If you want to retrieve single user record then you can use the following endpoint.
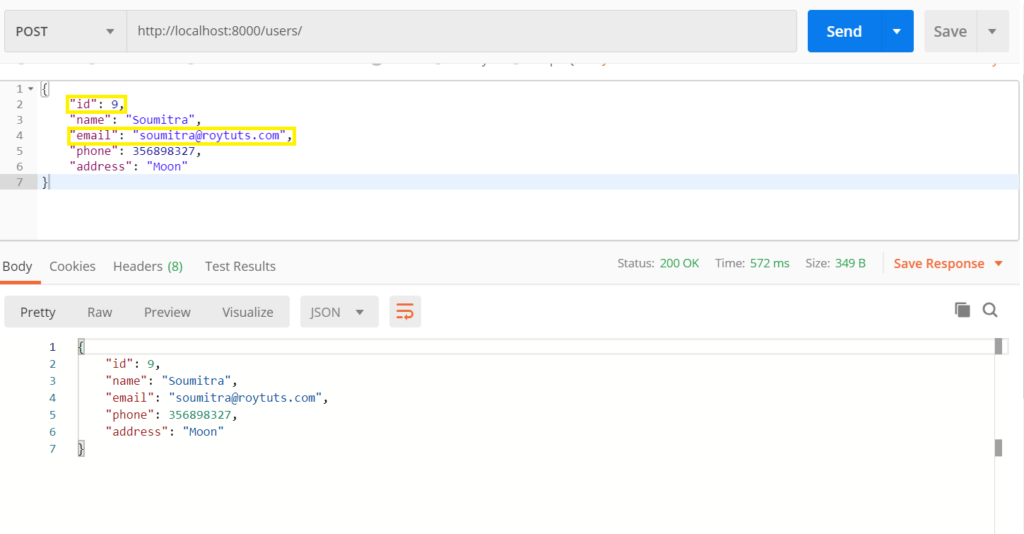
Create New User Record
Make a POST request with the following request body and you will get the corresponding response with the newly created user.

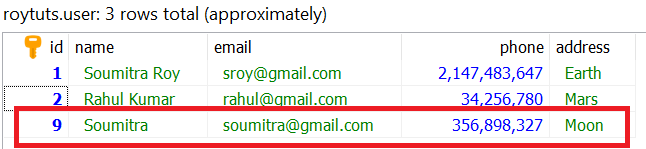
You can also verify the database table to check the new record exists or not.
Update User Record
Now I will update the newly created user record.
Now verify the database:
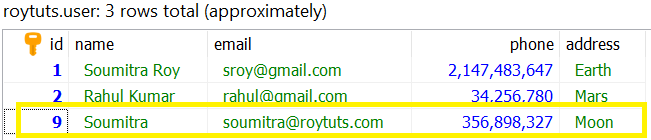
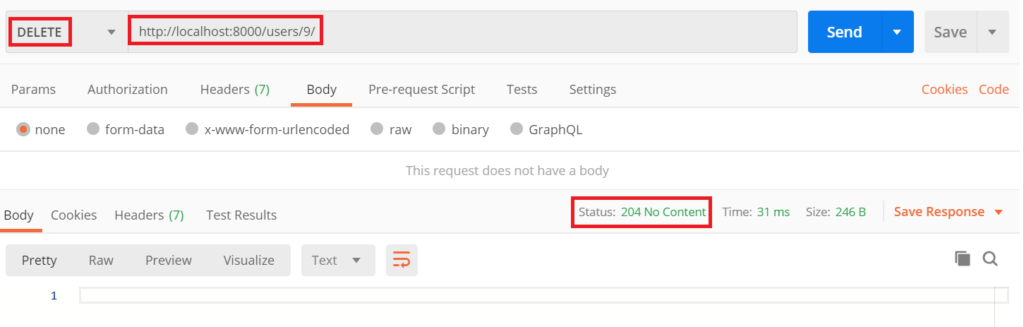
Delete User Record
Now I will delete user record:
You can also validate record in datbase:

That’s all about Django MySQL REST API CRUD Example.
Source Code
Thanks for reading.
When i post data without manually providing id , it is giving me error and when i manually provide id then it gets executed perfectly