Introduction
In this post you will see how to upload file to server using React JS framework. In server side you can use any server side technology for implementing REST API that will store file into a physical path or persistence storage. Here I will only focus on client side technology React framework only. user will be provided a browse button to select a file and a button for uploading file into server. The button will be disabled by default until a user selects a file for uploading.
You may also like to read How to download file from server using React.

Prerequisites
React 16.8.6 – 17.0.2, Node v11.3.0/v14.15.5, npm 6.4.1/6.14.11
Go through the following steps for creating React project to download file from server using React.
Project Setup
Go through the link https://roytuts.com/react-application-windows/ to create new React JS project. make sure to give the project name as react-file-upload.
Wait till the project directory creation is not finished. When done you will get successful message.
Make sure you check the application runs at http://localhost:3000/ by executing npm start on project directory react-file-upload using cmd prompt.
Note that when you open a file or edit a file in subsequent sections you will by default refer to the project root directory react-file-upload and later I may not mention this directory name.
Change the Title
When project directory creation is finished with all of its components then first task is to change the default title of the page.
Open the file public/index.html and update the title tag as shown below:
<title>File Upload Example - React App</title>React Class – UploadFile
Create UploadFile.js file under src directory with below content. Notice that you need to import the required module or component such as import React from ‘react’.
You should initialize variable’s state in constructor in the below class. It is always good idea to call the super constructor even if you do not initialize any variable here.
You have two property of the class – file and msg. The file property holds the selected file and msg property sets any available message.
You have a function onFileChange() that checks whether a file has been selected or not for upload and accordingly disables or enables the upload button.
I define a function called uploadFileData() that will call REST API URL, for example, http://localhost:8080/upload and this REST API could be implemented using any server side technology as per your requirement.
Here the server URL uploads the file data.
I create a new form and append the file data into request body with a parameter file.
On file upload success I display the success message to the end user.
Next I have render() function to render the elements of React app. Elements are the building blocks of React apps.
So in this render() function I define our HTML elements with button and link to download file.
The uploadFileData() function is called on onClick() function (onclick event of JavaScript).
import React from 'react';
import './upload.css';

class UploadFile extends React.Component {

	constructor(props) {
		super(props);
		this.state = {file: '', msg: ''};
	}

	onFileChange = (event) => {
		this.setState({
			file: event.target.files[0]
		});
	}

	uploadFileData = (event) => {
		event.preventDefault();
		this.setState({msg: ''});

		let data = new FormData();
		data.append('file', this.state.file);

		fetch('http://localhost:8080/upload', {
			method: 'POST',
			body: data
		}).then(response => {
			this.setState({msg: "File successfully uploaded"});
		}).catch(err => {
			this.setState({error: err});
		});

	}

	render() {
		return (
			<div id="container">
				<h1>File Upload Example using React</h1>
				<h3>Upload a File</h3>
				<h4>{this.state.msg}</h4>
				<input onChange={this.onFileChange} type="file"></input>
				<button disabled={!this.state.file} onClick={this.uploadFileData}>Upload</button>
			</div>
		)
	}

}

export default UploadFile;
Export the UploadFile at the end of the UploadFile class so that you can use this class in other modules, such as, I have used it later in below index.js file.
Style – upload.css
Notice I had included upload.css style file into the above file but I didn’t say anything about it. This file is kept under the src directory.
The upload.css file contains simple style to for the div with id container and defines the width of the div with auto margin.
#container {
	width: 800px;
	margin: auto;
}
Update index.js
Update the index.js file under src directory to import the UploadFile class. To import a class you must first have to export it as you did for UploadFile in the last line.
Notice how I render the React elements using render() from UploadFile into a div called root, which is present on the public/index.html file.
import React from 'react';
import ReactDOM from 'react-dom';
import UploadFile from './UploadFile';
import * as serviceWorker from './serviceWorker';

ReactDOM.render(<UploadFile />, document.getElementById('root'));

// If you want your app to work offline and load faster, you can change
// unregister() to register() below. Note this comes with some pitfalls.
// Learn more about service workers: https://bit.ly/CRA-PWA
serviceWorker.unregister();
Enough coding! Let’s make our application runnable and testable.
For React version 17, you will find the following index.js file:
import React from 'react';
import ReactDOM from 'react-dom';
import './index.css';
//import App from './App';
import reportWebVitals from './reportWebVitals';

import UploadFile from './UploadFile';

ReactDOM.render(
  <React.StrictMode>
    <UploadFile />
  </React.StrictMode>,
  document.getElementById('root')
);

// If you want to start measuring performance in your app, pass a function
// to log results (for example: reportWebVitals(console.log))
// or send to an analytics endpoint. Learn more: https://bit.ly/CRA-vitals
reportWebVitals();
Testing the Application
If you didn’t run the command npm start on your project root directory from cmd prompt then you can execute this command. The application will start at http://localhost:3000 and open in a default browser.
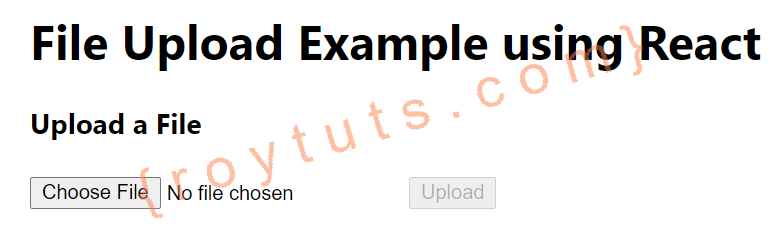
Home Page
The home page of the application looks to the similar image as shown below:
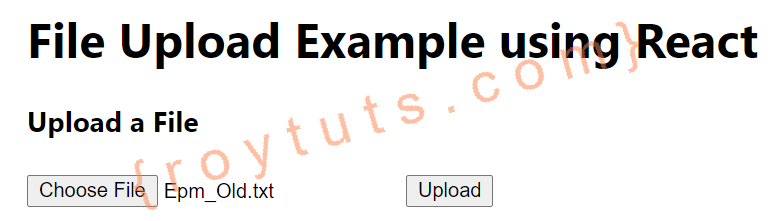
File – Selection
When you select a file using browse button:
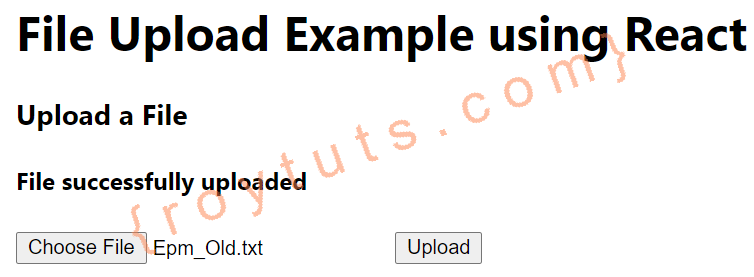
File – Upload Success
When file successfully uploaded to the server:
For server side code using Spring Boot you can use Upload File using React and Spring Boot.
Hi, I have been wanted to learn how can we upload a file to server without database and found your blog regarding it. I have finished and everything is working fine but in the end the uploaded file status is getting failed. Can you please help me to resolve the problem.