Introduction
In this tutorial I will show you how you can validate your input data while working with REST service. Generally you need to validate the input data coming from end users because users may give anything as an input but your service side code should not accept anything as an input for the defined field.
Prerequisites
Please go through the tutorial Documenting Spring REST API with Swagger 2
Example
Please find below steps to implement the example on how to validate data in REST service.
For complete validation you can go through form validation in web app using Spring Boot framework.
Maven Dependency
Add following dependency in addition to the above tutorial in order to implement the Bean validation using annotations.
<!-- JSR 303 Dependencies - validator api -->
<dependency>
	<groupId>javax.validation</groupId>
	<artifactId>validation-api</artifactId>
	<version>1.0.0.GA</version>
</dependency>
<!-- hibernate validator framework -->
<dependency>
	<groupId>org.hibernate</groupId>
	<artifactId>hibernate-validator</artifactId>
	<version>4.3.1.Final</version>
</dependency>
Creating VO Class
Create below Bean that represents as a request data would be coming from the client.
import java.util.List;
import javax.validation.constraints.NotNull;
import org.hibernate.validator.constraints.NotEmpty;
public class RequestHello {
	private boolean saveDefault;
	@NotNull
	@NotEmpty(message = "At least one hello must be selected.")
	private List<String> hellos;
	public boolean isSaveDefault() {
		return saveDefault;
	}
	public void setSaveDefault(boolean saveDefault) {
		this.saveDefault = saveDefault;
	}
	public List<String> getHellos() {
		return hellos;
	}
	public void setHellos(List<String> hellos) {
		this.hellos = hellos;
	}
}
In the above class we have used @NotNull, which will ensure that the list is not null or at least one element must be there in the list. @NotEmpty annotation tells what message to display when the list does not contain at least one element.
Creating Spring REST Controller
Now add the below method to the existing Spring Rest Controller class.
@RequestMapping(value = "/update", method = RequestMethod.POST)
@ApiOperation(value = "Returns success or failure message", notes = "Method to save Hello World.")
public ResponseEntity updateHelloWorld(@Valid @RequestBody RequestHello requestHello, BindingResult bindingResult) {
	HttpHeaders headers = new HttpHeaders();
	ObjectMapper mapper = new ObjectMapper();
	headers.setContentType(MediaType.TEXT_PLAIN);
	ObjectNode responseNode = mapper.createObjectNode();
	if (bindingResult.hasErrors()) {
		responseNode.put("code", HttpStatus.BAD_REQUEST.toString());
		responseNode.put("message", bindingResult.getAllErrors().get(0).getDefaultMessage());
		return new ResponseEntity<>(responseNode, headers, HttpStatus.BAD_REQUEST);
	}
	// TODO :: actual update or save to some persistence storage
	responseNode.put("code", HttpStatus.OK.toString());
	responseNode.put("message", "Hellos successfully updated");
	return new ResponseEntity<>(responseNode, headers, HttpStatus.OK);
}
In the above method we have used @Valid annotation just before @RequestBody parameter. @RequestBody means, the parameters have to be set to the Body of the REST service. Valid annotation validates the request body parameters according to the annotations set on the Bean class’s attributes.
Then we have passed BindingResult parameter and it is required immediately after the @RequestBody parameter in order to retrieve the exceptions in view.
Then we create the ResponseEntity object to show http status code and message to the end user.
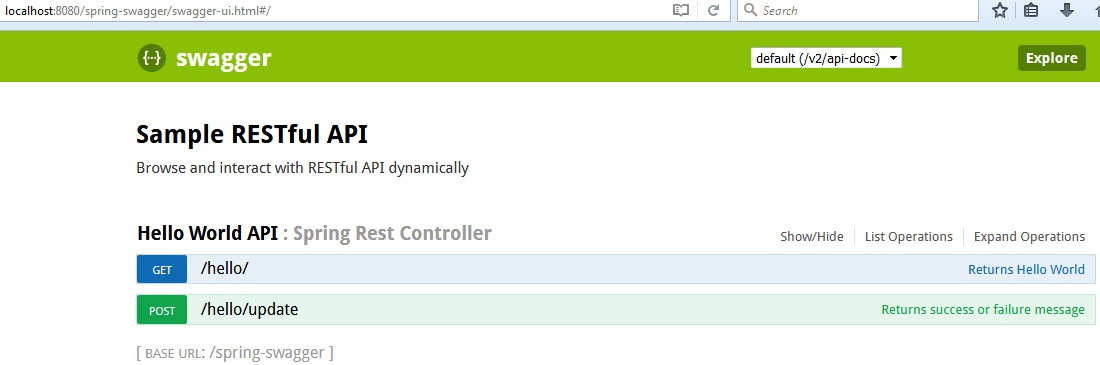
Testing the Application
When you run the application for testing in swagger UI, you will see the below output in the browser.
Failure Scenario
Input
{
  "hellos": [
  ],
  "saveDefault": true
}
Output
{"code":"400","message":"At least one hello must be selected."}Success Scenario
Input
{
  "hellos": [
    "Hello, World",
    "Hello, World!"
  ],
  "saveDefault": true
}
Output
{"code":"200","message":"Hellos successfully updated"}Thanks for reading.
Hi, does this code use the generated code from swagger (does this have a yaml file). If yes, then how did you add BindingResult in the swagger file?