Introduction
I will discuss here how to work with parent and child templates in flask framework. In other words it is said template (Jinja) inheritance. So I will create a base or parent template which child template or pages will extend to include the common functionalities instead of repeating common functionalities into every page you need to use for your web application.
A template contains the static parts of the desired HTML output as well as some special syntax describing how dynamic content will be inserted.
A template is simply a text file. It can generate any text-based format (HTML, XML, CSV, etc.).
In flask, a template doesn’t need to have a specific extension: .html, .xml, or any other extension is just fine.
A template contains variables and/or expressions, which get replaced with values when a template is rendered; and tags, which control the logic of the template.
Related Posts:
When to use Template
Let’s say you want to build a web application using flask API and in your app you have web pages where links in header, copyright on footer and links on left menu are common for every page. Therefore the body content of the every page changes.
In the above scenario you can avoid the redundant content including in every page of the web application and you can use a template which will vary the content for the body area only.
Flask API, which is built on Python, already provides such template framework called Jinja. You can easily use such template framework to build our sophisticated web application.
Prerequisites
Python 3.8.5, Flask 1.1.2
Project Directory
Create a project root directory called python-flask-templates as per your chosen location.
I may not mention the project’s root directory name in the subsequent sections and I will assume that I am creating files with respect to the project’s root directory.
Configuring Application
I will configure application through flask framework. Create a file called app.py with the below code.
I have created the flask instance in the following way.
The idea of the first parameter is to give Flask an idea of what belongs to your application and this name is used to find resources on the filesystem.
If you are using a single module, name is always the correct value. If you however are using a package, it’s usually recommended to hardcode the name of your package there.
from flask import Flask

app = Flask(__name__)
Parent or Base Template
I will create a base or parent template file that one or more child templates or pages will inherit.
The common strategy to put the template files under templates directory. So you need to create a parent template file parent.html file under templates directory.
I will also include the common areas such as header, footer and left which are kept into separate files.
There are a few kinds of delimiters. The default Jinja delimiters are configured as follows:
{% … %}for Statements{{ … }}for Expressions to print to the template output{# … #}for Comments not included in the template output… ##for Line Statements
<!DOCTYPE html>
<html>
	<head>
		<meta name="viewport" content="width=device-width, initial-scale=1.0">
		<title>Parent and Child Templates in Flask - {% block title %}{% endblock %}</title>
		<link rel="stylesheet" href="https://cdnjs.cloudflare.com/ajax/libs/font-awesome/4.7.0/css/font-awesome.min.css">
		<link type="text/css"  rel="stylesheet" href="{{ url_for('static', filename='css/main.css') }}"/>
		<script type="text/javascript" href="{{ url_for('static', filename='js/sample.js') }}"></script>
		{% block head %}
		{% endblock %}
	</head>
<body>

	{% include "snippets/header.html" %}

	<div class="row">

		{% include "snippets/left.html" %}

		<div class="col-s-6">

			{% block content %}{% endblock %}

		</div>

	</div>

	{% include "snippets/footer.html" %}

</body>
</html>
In the above example, the {% block %} tags define four blocks that child templates can fill in. All the block tags tell the template engine that a child template may override those placeholders in the template.
I have put {% block title %}{% endblock %} which may or may not be replaced by child template or page depending on whether you want to provide additional title or not in addition to what I have provided in the base or parent template file.
Next I have included css (cascading Style Sheet) and js (JavaScript) files which will be inherited into all child template files using url_for() function.
Related Posts:
The url_for() function generates a URL to the given endpoint with the method provided.
Then I have added block {% block head %}{% endblock %} which may or may not be replaced by child templates depending upon whether child template adds any additional css or js file(s).
I have included few static files such as header.html, footer.html, left.html files using {% include <file location> %}, for example, to include header file I have used {% include "snippets/header.html" %}.
The child template file replaces the body content on tag {% block content %}{% endblock %} as written on the parent template file.
Next you will see the contents of header, left and footer files. These files are kept under templates/snippets folder.
Header Links – header.html
The header.html file contains the header links or navigation.
The links also adds the corresponding routes using url_for() in flask framework so that clicking on the link will take you to the corresponding page.
<div class="header">
	<ul class="header-links">
		<li><a href="{{ url_for('.home') }}">Home</a></li>
		<li><a href="{{ url_for('.testimonials') }}">Testimonials</a></li>
		<li><a href="{{ url_for('.products') }}">Our Products</a></li>
	</ul>
</div>
Left Links – left.html
The left.html file contains the left menu links or navigation.
As you had seen for header links, the left menu links also adds the corresponding routes using url_for() in flask framework so that clicking on the link will take you to the corresponding page.
<div class="col-s-3 menu">
	<ul class="menu menu-ul">
		<div class="menu menu-ul menu-li"><a href="{{ url_for('.about') }}">About Us</a></div>
		<div class="menu menu-ul menu-li"><a href="{{ url_for('.contact') }}">Contact Us</a></div>
	</ul>
</div>
Copyright Information – footer.html
The footer.html file contains the copyright information. This file just contains the copyright year but ideally your page should have little more information in addition to this, such as links for privacy policy and terms and conditions etc.
<div class="footer">
<p>© Copyright {{ now.year }}</p>
</div>Child Templates
I have several links in the parent template file so I have to have pages for these links. Therefore I need to create child template files for such links or pages.
I may not show here source codes for all templates but you can always download them from the download link given under source code section.
Related Posts:
Let’s see the source code for home page or index page.
{% extends "parent.html" %}
{% block title %}Welcome{% endblock %}
{% block content %}
    <h1>Welcome</h1>
    <p>
		Welcome to working with parent and child templates in flask
	</p>
{% endblock %}
In the above child template file notice how I am inheriting the features from base or parent template file using extends keyword, i.e., {% extends "parent.html" %}.
Note that in the above child template I have not added any extra css or any other static resources. So there is no need to override the {% block head %} {% endblock %}.
The body of the content in template is replaced by {% block content %} {% endblock %}.
Let’s see the source code for contact us page:
{% extends "parent.html" %}
{% block title %}Contact Us{% endblock %}
{% block head %}
	<link type="text/css"  rel="stylesheet" href="{{ url_for('static', filename='css/contact.css') }}"/>
{% endblock %}
{% block content %}
	<script>
		function fnSubmit(){
			document.getElementById("SuccessMsg").style.display = "block";
			return false;
		}
	</script>

	<div style="text-align:center">
		<h1>Contact Us</h1>
		<p>Use the form below to leave us a message:</p>
	</div>

	<div class="row">
		<div class="column">
		</div>
		<div class="column">
			<label for="fname">Name</label>
			<input type="text" id="name" name="name" placeholder="Your name..">
			<label for="message">Your Message</label>
			<textarea id="message" name="message" placeholder="Write something.." style="height:100px"></textarea>
			<label id="SuccessMsg" style="color:green; display:none"><strong>Form Submitted Successfully!</strong></label>
			<input type="submit" value="Submit" onclick="javascript:fnSubmit()" />
		</div>
	</div>
{% endblock %}
Notice in the above contact us template file, you have the similar thing as you had for your index template file but here you have overridden the {% block head %} {% endblock %} to include the page specific css file which is required for only contact us page.
Related Posts:
Configuring Routes
You will now configure routes for loading template files on requests from navigation links on UI.
Create a main.py file with the following source code:
from app import app
from flask import render_template
from datetime import datetime

@app.context_processor
def inject_now():
    return {'now': datetime.utcnow()}

@app.route('/')
def home():
	return render_template('index.html')

@app.route('/about')
def about():
	return render_template('about.html')

@app.route('/testimonials')
def testimonials():
	return render_template('testimonials.html')

@app.route('/contact')
def contact():
	return render_template('contact.html')

@app.route('/products')
def products():
	return render_template('products.html')

if __name__ == "__main__":
    app.run()
All functions except the one which is decorated using @app.context_processor are simple and they just render the template files.
The inject_now() function provides us a new variable injection into the context of Jinja2 templates. You can find more on context processors in flask by reading the tutorial context processors in flask.
Running the Application
Now navigate to the project root directory and execute the command python main.py, your server will start on default port 5000.
If you want to change the port then you can change the line app.run() to app.run(port=5001), where 5001 is the new port.
Testing the Application
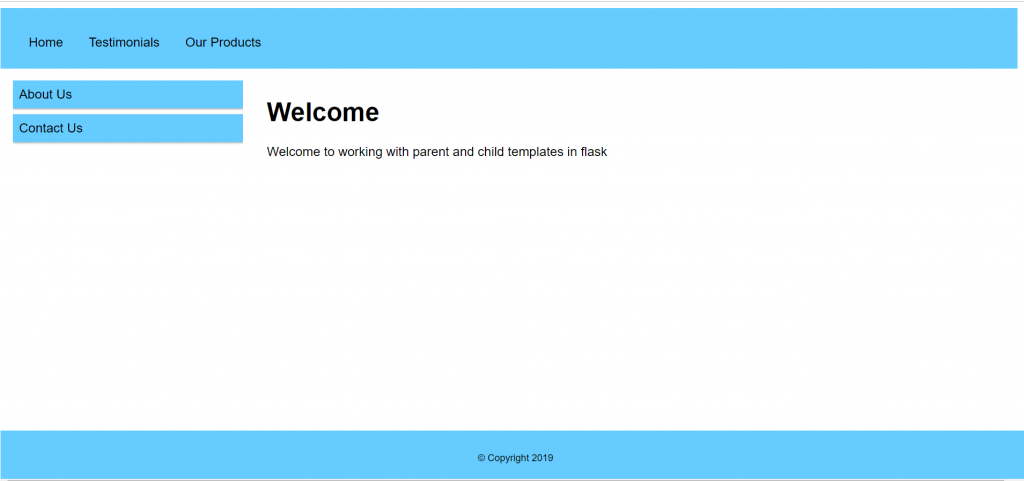
When you hit the URL http://localhost:5000 in the browser you will following output on the browser:
Now you can click on any link and try to check whether it’s working fine or not.
It was a basic example to show you how to work with the parent and child template files flask based web application.
Source Code
Thanks for reading.