Introduction
Here you will see a post ot tutorial on CodeIgniter login logout example. So here I will show you how to use CodeIgniter’s session library to store data into session or fetch data from session. You will also see how to allow a user access private area of the application once user logs into the system. I will use CodeIgniter’s form validation library to validate the input fields.
Prerequisites
Apache HTTP Server 2.4, PHP 7.3.5 – 7.4.23, CodeIgniter 3.1.10 – 3.1.11, MySQL Server 5.6 – 8.0.26
Please go through the following steps to implement CodeIgniter login logout example.
Project Directory
It’s assumed that you have setup Apache, PHP and Codeigniter in Windows system.
Now I will create a project root directory called codeIgniter-login-logout under the Apache server’s htdocs folder.
Now move all the directories and files from CodeIgniter framework into codeIgniter-login-logout directory.
I may not mention the project root directory in subsequent sections and I will assume that I am talking with respect to the project root directory.
Autoload Configuration
You need some configurations, such as, auto-loading for helpers to avoid loading every time you need to use.
Modify application/config/autoload.php file for auto-loading libraries and helper functions.
This one time auto-loading gives flexibility to uniformly use the helpers and libraries anywhere throughout the application without loading repeatedly.
$autoload['libraries'] = array('database', 'session');
$autoload['helper'] = array('url', 'form', 'security');
Session Configuration
By default session is saved into file system. Therefore You need to configure the path where session will be saved on disk. I will configure here temp system’s directory to save the session data. The change is made into application/config/config.php file.
$config['sess_save_path'] = sys_get_temp_dir();Database Configurations
Now I will configure database connection into application/config/database.php file. Please make sure to change according to your database settings.
$db['default'] = array(
	'dsn'	=> '',
	'hostname' => 'localhost',
	'username' => 'root',
	'password' => 'root',
	'database' => 'roytuts',
        ...
);
Language File
If you want to display information on website in different languages, then you need to create different language files for your application. Therefore, you eed to create language specific files from where the information will be loaded for a particular language when chosen by end users.
Here I will create only English language file to store few messages. The language file must end with _lang.php, though while loading the language file, I will not use this suffix.
Create a file called msg_lang.php under application/language/english folder.
<?php

$lang['incorrect_credentials'] = 'Incorrect username or password';
$lang['login_success'] = 'You have been successfully logged in';
$lang['logout_success'] = 'You have been successfully logged out';

/* End of file msg_lang.php */
/* Location: ./application/language/english/msg_lang.php */
MySQL Table
You may want to store user information into MySQL database, so You need to create a table for this.
If you are using MySQL server 5.x then use the following table structure.
CREATE TABLE login (
    id INT(10) UNSIGNED AUTO_INCREMENT PRIMARY KEY,
    username VARCHAR(255) NOT NULL,
    password VARCHAR(255) NOT NULL,
    last_login DATETIME DEFAULT CURRENT_TIMESTAMP
);
If you are using MySQL server version 8.x then you can use the following table structure:
CREATE TABLE login (
    id INT UNSIGNED COLLATE utf8mb4_unicode_ci AUTO_INCREMENT PRIMARY KEY,
    username VARCHAR(255) COLLATE utf8mb4_unicode_ci NOT NULL,
    password VARCHAR(255) COLLATE utf8mb4_unicode_ci NOT NULL,
    last_login DATETIME COLLATE utf8mb4_unicode_ci DEFAULT CURRENT_TIMESTAMP
);
Insert Data into Table
Insert a row into the above table so that you can test your application once implementation is complete.
Ideally password should not be kept as a plain text, you should consider always security for this and use some encryption mechanism.
insert into login(username,password) values ('user','user');Model Class
I perform database operations to store, fetch or update data into database.
Create a file authmodel.php under applications/models folder to create the required model class.
In the below model class, I fetch the user for a given username and password from the login table. If no user found then I simply return NULL.
<?php

defined('BASEPATH') OR exit('No direct script access allowed');

/**
* Description of AuthModel
*
* @author https://roytuts.com
*/

class AuthModel extends CI_Model {

	private $login = 'login';

	function get_user($username, $password) {
		$this->db->limit(1);
		$this->db->where('username', $username);
		$this->db->where('password', $password);

		$query = $this->db->get($this->login);

		if($query->row()) {
			return $query->row();
		}

		return NULL;
	}

}

/* End of file authmodel.php */
/* Location: ./application/models/authmodel.php */
Library
I will create a library to provide common functions related to user’s authentication.
Create a PHP file authlibrary.php under application/libraries folder.
In the below library class I have defined two constants – STATUS_ACTIVATED and STATUS_NOT_ACTIVATED. These two constants will indicate whether current user is logged in or not.
I have defined few functions, such as, login(), logout(), is_logged_in(), get_user_name(), get_error_msg() into this library to make our life easier. I have retrieved the CodeIgniter instance, I have loaded language file and model class inside the constructor. You may also auto-load the language file and model class.
<?php

if (!defined('BASEPATH'))
    exit('No direct script access allowed');

define('STATUS_ACTIVATED', '1');
define('STATUS_NOT_ACTIVATED', '0');

/**
 * Description of AuthLibrary
 *
 * @author https://roytuts.com
 */
class AuthLibrary {

    private $ci;
    private $msg;

    function __construct() {
        $this->ci = & get_instance();
        $this->ci->lang->load('msg');
		$this->ci->load->model('authmodel');
    }

    /*
     * get message
     */

    private function get_msg($msg) {
        $this->msg .= $msg . nl2br("\n");
    }

    /*
     * display message
     */

    function display_msg() {
        return $this->msg;
    }

    /**
     * Login user on the site. Return TRUE if login is successful
     * (user exists and activated, password is correct), otherwise FALSE.
     *
     * @param	string	(username)
     * @param	string  (password)
     */
    function login($username, $password) {
        if ((strlen($username) > 0) AND (strlen($password) > 0)) {
			$user = $this->ci->authmodel->get_user($username, $password);
            if ($user !== NULL) {
				$this->ci->session->set_userdata(array(
					'user_name' => $user->username,
					'last_login' => $user->last_login,
					'user_status' => STATUS_ACTIVATED
				));
                return TRUE;
            } else {               // fail - wrong creadentials
                $this->get_msg($this->ci->lang->line('incorrect_credentials'));
            }
        }
        return FALSE;
    }

    /**
     * Logout user from the site
     *
     * @return	void
     */
    function logout() {
        $this->ci->session->set_userdata(array('user_name' => '', 'last_login' => '', 'user_status' => ''));
        $this->ci->session->sess_destroy();
    }

    /**
     * Check if user logged in. Also test if user is activated or not.
     *
     * @param	bool
     * @return	bool
     */
    function is_logged_in($activated = TRUE) {
        return $this->ci->session->userdata('user_status') === ($activated ? STATUS_ACTIVATED : STATUS_NOT_ACTIVATED);
    }

    /**
     * Get user_name
     *
     * @return	string
     */
    function get_username() {
        if ($this->ci->session->userdata('user_name')) {
            return $this->ci->session->userdata('user_name');
        }
        return '';
    }

    /**
     * Get error message.
     * Can be invoked after any failed operation such as login or register.
     *
     * @return	string
     */
    function get_error_message() {
        return $this->msg;
    }

}

/* End of file authlibrary.php */
/* Location: ./application/libraries/authlibrary.php */
Controller Class
Create a controller file authcontroller.php under application/controllers with the following source code.
The below controller class handles request and response for clients.
The controller class has a method called index() that first checks if the current user is already logged into the application. If the current user not logged in then the user will be redirected to the login page.
The login() function performs some validations on user’s credentials input through login form. If the validations are passed then user will see the private area of the application otherwise user will be redirected to the login form with error message.
The logout() function simply clears out all session data and redirects user to the login page.
<?php
defined('BASEPATH') OR exit('No direct script access allowed');

/**
 * Description of AuthController
 *
 * @author https://roytuts.com
 */

class AuthController extends CI_Controller {

	private $msg;

    function __construct() {
        parent::__construct();
		$this->lang->load('msg');
		$this->load->library('authlibrary');
        $this->load->library('form_validation');
    }

    private function display_msg($msg) {
        $this->msg .= $msg . nl2br("\n");
    }

	function index() {
		if (!$this->authlibrary->is_logged_in()) {
            redirect('authcontroller/login');
        } else {
			$this->load->view('home');
		}
	}

	function login() {
        if ($this->input->post('login')) {
            $this->form_validation->set_rules('username', 'Username', 'trim|required|max_length[100]|xss_clean');
            $this->form_validation->set_rules('password', 'Password', 'trim|required|max_length[25]|xss_clean');
            if ($this->form_validation->run()) {        // validation ok
				$username = $this->input->post('username');
                $password = $this->input->post('password');
                if ($this->authlibrary->login($username, $password)) {        // success
                    $this->session->set_flashdata($this->config->item('msg_key'), $this->lang->line('login_success'));
                    $this->session->keep_flashdata($this->config->item('msg_key'));
                    redirect('/');
                } else {
                    $errors = $this->authlibrary->get_error_message();
                    $this->display_msg($errors);
                }
            }
        }
        $data['errors'] = $this->msg;
        $data['msg'] = '';
        if ($message = $this->session->flashdata($this->config->item('msg_key'))) {
            $data['msg'] = $message;
        }
        $this->load->view('login', $data);
    }

    function logout() {
        if ($this->authlibrary->is_logged_in()) {
            $this->authlibrary->logout();
            $this->session->set_flashdata($this->config->item('msg_key'), $this->lang->line('logout_success'));
            $this->session->keep_flashdata($this->config->item('msg_key'));
        }
        redirect('authcontroller/login');
    }
}
Creating View Files
The view file is responsible for displaying information on the web page.
So I will create here two view files login.php and home.php under application/views folder.
The login.php file will display input fields along with submit button. The user will use these input fields to input his/her credentials to log into the application.
The home.php page will be shown upon successful login to the application with welcome message, last login date time and logout link.
login.php
Add below source to login.php file.
<!DOCTYPE html>
<html>
    <head>
        <meta http-equiv="Content-Type" content="text/html; charset=UTF-8"/>
        <title>Codeigniter Login Logout Example</title>
        <link rel="stylesheet" type="text/css" href="<?php echo base_url(); ?>assets/css/login.css" media="screen" />
    </head>
    <body>
        <div class="wrap">
            <div id="content">
                <div id="main">
                    <div class="full_w">
                        <?php
							if ($msg) {
								echo '<div class="n_ok"><p>';
								echo $msg;
								echo '</p></div>';
							}

							if($this->session->flashdata($this->config->item('msg_key'))) {
								echo $this->session->flashdata($this->config->item('msg_key'));
							}
                        ?>
                        <?php
							echo form_open($this->uri->uri_string());
							if (validation_errors()) {
								echo '<div class="n_error">';
								echo validation_errors();
								echo '</div><div class="sep"></div>';
							}
							if (isset($errors) && strlen($errors)) {
								echo '<div class="n_error">';
								echo $errors;
								echo '</div><div class="sep"></div>';
							}
                        ?>
                        <label for="username">Username:</label>
                        <input id="username" name="username" class="text" type="text"
                               maxlength="100"/>
                        <label for="password">Password:</label>
                        <input id="password" name="password" type="password"
                               class="text" maxlength="25"/>
                        <div class="sep"></div>
                        <input type="submit" name="login" id="login" value="Login"/>
                        <?php
                        echo form_close();
                        ?>
                    </div>
                </div>
            </div>
        </div>
    </body>
</html>
Now in our above view file I have added login.css file to apply some styles.
Here is the source code of login.css file.
* {
    margin: 0;
    padding: 0;
}
body{
    background: #f3f3f3 url(../img/bg_login_top.jpg) no-repeat top center;
    color: #bebebe;
    font-family: Tahoma, Arial, Helvetica, sans-serif;
    font-size: 11px;
    margin: 0;
}

a{
    text-decoration: none;
}
a:hover{
    text-decoration: underline;
}

h1, h2, h3, h4{
    font-family: Arial, sans-serif;
    color: #444444;
}


button, .button{
    background: #F3F3F3;
    border: 1px solid #DCDCDC;
    border-radius: 2px;
    color: #444444;
    cursor: pointer;
    display: inline-block;
    font: 700 11px Tahoma, Arial, sans-serif;
    margin-right: 10px;
    padding: 7px 12px 7px 12px;
    position: relative;
    text-decoration: none;
    text-shadow: 0px 1px 0px #FFFFFF;
}
button:hover, .button:hover{
    border-bottom-color: #999999;
    border-left-color: #999999;
    border-right-color: #999999;
    border-top-color: #999999;
    color: #333333;
    text-decoration: none;
}

.wrap{
    margin: 0 auto;
    width: 400px;
}

#content{
    margin: 120px 0 10px 0;
}
#content .b1{
    background: #ffffff;
}
#content .b2{
    background: #eaeaea;
}


/* CONTENT MAIN START */

#content #main{
    float: right;
    margin: 0 0 12px 0;
    width: 400px;
}
#main .full_w{
    background: #ffffff;
    border: 1px solid #DCDDE1;
    border-radius: 5px;
    -webkit-box-shadow:  2px 2px 0px 1px rgba(235, 235, 235, 1);
    -moz-box-shadow:  2px 2px 0px 1px rgba(235, 235, 235, 1);
    box-shadow:  2px 2px 0px 1px rgba(235, 235, 235, 1);
    color: #848484;
    margin: 0 0 5px 0;
}
#main .full_w .h_title{
    background: url(../img/bg_box_head.jpg) repeat-x;
    color: #bebebe;
    font-size: 11px;
    font-weight: normal;
    height: 22px;
    padding: 7px 0 0 15px;
    text-shadow: #0E0E0E 0px 1px 1px;
}

/* CONTENT MAIN FORM */

.left{ 	float: left; width: 230px;}
.right{ float: right; width: 215px;}
.right h3{	margin: 0 0 8px 0;}
.right p{	margin: 0 0 8px 0;}

#main form{
    margin: 15px;
}
#main form .element{
    clear: both;
    border-bottom: 1px dashed #ededed;
    display: block;
    margin: 0;
    padding: 10px 10px;
}
#main form label{
    color: #575757;
    display: block;
    font-size: 12px;
    font-weight: bold;
    margin: 0 0 5px 0;
    padding: 0 0 0 3px;
}
#main form label span{
    color: #b8b8b8;
    font-size: 11px;
    font-weight: normal;
}
#main form input, #main form select, #main form textarea{
    background: #FFFFFF;
    border: 1px solid #DDDDDD;
    border-radius: 3px;
    font-size: 11px;
    font-family: Tahoma, Arial, Helvetica, sans-serif;
    padding: 5px 3px;
}
#main form input:focus, #main form select:focus, #main form textarea:focus{border: 1px solid #b3b3b3;}

#main form select{
    border: 1px solid #DDDDDD;
    border-radius: 3px;

}
#main form .text{
    margin: 0 0 12px 0;
    width: 98%;
}

#main form .ok{
    background: #F3F3F3 url(../img/i_ok.png) no-repeat 4px center;
    padding-left: 25px;
}

#main .footer{
    margin: 0 15px;
    text-align: center;
    text-shadow: 1px 1px 0px #ffffff;
}
#main .footer a{
    color: #bebebe;
}

/* MAIN NOTIFY */

#main .n_warning{background: #FFF7CE;border: 1px solid #D9C65B; border-radius: 3px; margin: 20px 15px;padding: 1px;}
#main .n_warning p{	background: #FDF0B1 url(../img/i_warning.png) no-repeat 4px center;	color: #756B30;	padding: 7px 25px;}
#main .n_warning a{	color: #756B30;	font-weight: bold;}

#main .n_ok{background: #F6FFEC;border: 1px solid #89B755; border-radius: 3px; margin: 20px 15px;padding: 1px;}
#main .n_ok p{background: #DFF6C5 url(../img/i_ok.png) no-repeat 4px center; color: #496528; padding: 7px 25px;}
#main .n_ok a{color: #756B30;	font-weight: bold;}

#main .n_error{background: #FDE4E1;border: 1px solid #B16A6C; border-radius: 3px; margin: 20px 15px;padding: 1px;}
#main .n_error p{background: #F4CAC6 url(../img/i_error.png) no-repeat 4px center; color: #630E18; padding: 7px 25px;}
#main .n_error a{color: #756B30;	font-weight: bold;}


/* HELPERS START */

.entry{ color: #444; margin: 5px 0; padding: 5px 15px; text-shadow: 0px 1px #ffffff; }
.sep{ border-bottom: 1px dashed #DDDDDD; margin: 10px 0;}

.clear{ clear: both; }

.align-left{ text-align: left; }
.align-right{ text-align: right; }

#top p{
    text-shadow: #000 0px 1px 1px;
}
Now in the above css file we have used many images, so you can download images or whole source code later from this tutorial.
home.php
This is the file which gets loaded once a user is successfully logged into the application.
<?php
defined('BASEPATH') OR exit('No direct script access allowed');
?><!DOCTYPE html>
<html lang="en">
<head>
	<meta charset="utf-8">
	<title>CodeIgniter Login Logout Example</title>

	<style type="text/css">

	::selection { background-color: #E13300; color: white; }
	::-moz-selection { background-color: #E13300; color: white; }

	body {
		background-color: #fff;
		margin: 40px;
		font: 13px/20px normal Helvetica, Arial, sans-serif;
		color: #4F5155;
	}

	a {
		color: #003399;
		background-color: transparent;
		font-weight: normal;
	}

	h1 {
		color: #444;
		background-color: transparent;
		border-bottom: 1px solid #D0D0D0;
		font-size: 19px;
		font-weight: normal;
		margin: 0 0 14px 0;
		padding: 14px 15px 10px 15px;
	}

	code {
		font-family: Consolas, Monaco, Courier New, Courier, monospace;
		font-size: 12px;
		background-color: #f9f9f9;
		border: 1px solid #D0D0D0;
		color: #002166;
		display: block;
		margin: 14px 0 14px 0;
		padding: 12px 10px 12px 10px;
	}

	#body {
		margin: 0 15px 0 15px;
	}

	p.footer {
		text-align: right;
		font-size: 11px;
		border-top: 1px solid #D0D0D0;
		line-height: 32px;
		padding: 0 10px 0 10px;
		margin: 20px 0 0 0;
	}

	#container {
		margin: 10px;
		border: 1px solid #D0D0D0;
		box-shadow: 0 0 8px #D0D0D0;
	}
	</style>
</head>
<body>

<div id="container">
	<div id="body">
		<p>
			<?php
				if($this->session->flashdata($this->config->item('msg_key'))) {
					echo $this->session->flashdata($this->config->item('msg_key'));
				}
			?>
		</p>
		<p>Welcome to Dashboard</p>
		<p>
			Last login: <strong><?php echo $this->session->userdata('last_login') == NULL ? 'First Time' : $this->session->userdata('last_login'); ?></strong>
			Welcome,</span> <strong><?php echo $this->session->userdata('user_name'); ?></strong>
			<?php echo anchor('authcontroller/logout', '[ Logout ]'); ?>
		</p>
	</div>
</div>

</body>
</html>
Route Configuration
You need to replace our default controller in application/config/routes.php file as shown below:
$route['default_controller'] = 'authcontroller';Running the Application
Make sure your Apache HTTP Server 2.4 is running.
Testing the Application
Login Page
Hit the URL http://[::1]/codeIgniter-login-logout/index.php/authcontroller/login in the browser to see the login page.
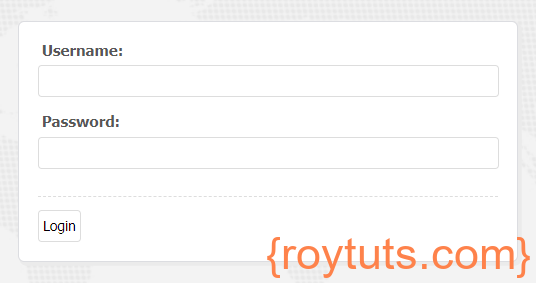
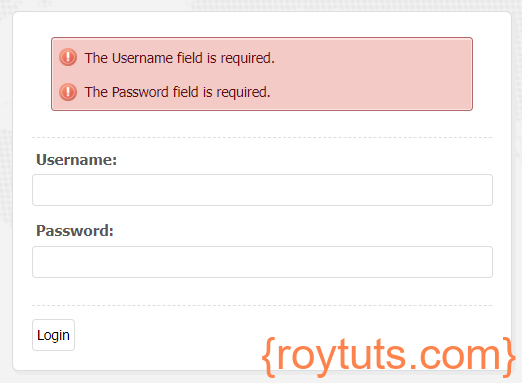
Login Error
Submit without entering username and password:
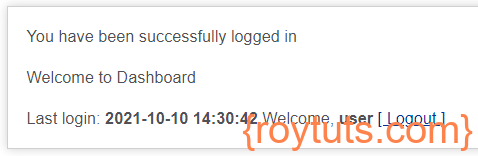
Login Success
When user logs in successfully, the user will see below home page.
Hello! I simply would like to offer you a big thumbs up for the excellent info you have right here on this post.
I will be coming back to your blog for more soon.